Native SDK Getting Started
In this section, you will learn how to build your first application: “HelloVR”.
Contents |
Set up your development environment
The first step is to set up the development environment on your PC.
- Download, install and launch your Android™ Studio: https://developer.android.com/studio
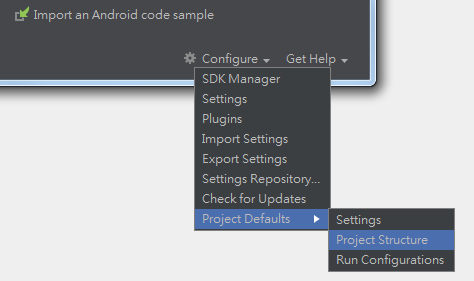
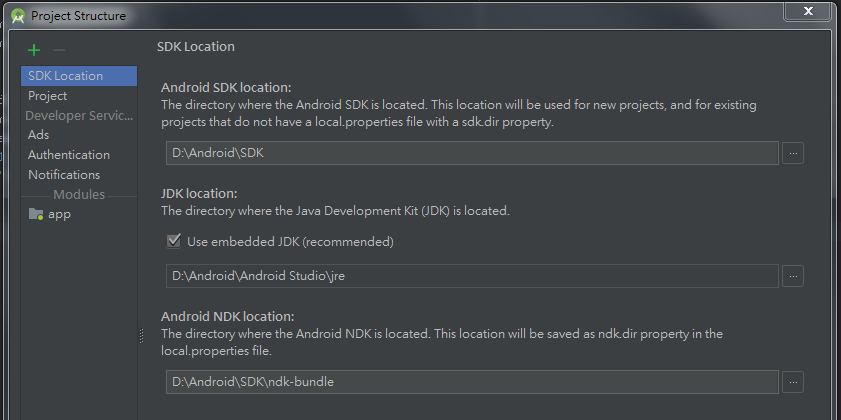
- In Android Studio, go to Configure > Project Defaults > Project Structure to set up your SDK location, JDK location and NDK location in Android™ Studio.
Download Wave SDK
You can download the Wave SDK from here.
SDK Folder Layout:
- apps: native sample APK.
- docs: developer guide.
- repo: SDK repository.
- plugins/unity: Unity plugin and sample.
- plugins/unreal: Unreal plugin and sample.
- samples: native sample source.
- tools: SDK tool APK.
For more information, refer to SDK/README.md
Build Wave App
- Use Android Studio to open the sample project
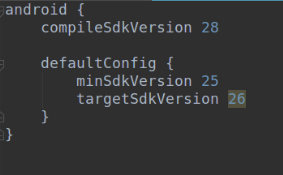
SDK/samples/wvr_native_hellovr
. - Modify
app/build.gradle
to comply with the Android™ SDK and build tool version of your Android Studio and then click File > Sync Project with Gradle Files.
Note
- Please check your Wave VR version and android targetSdkVersion on Wave VR Version List
- Make project: Build > Make Project.
- Build apk: Build > Build APK(s).
- After a successful build, you will see Event Log “APK(s) generated successfully”. Click locate to get the sample APK.
Install Wave Services
Note
- If you use the VIVE Wave™ Dev Kit, such as VIVE Focus, to develop your app, all necessary Wave services are pre-installed in the system. Skip this section and directly go to next step Run Wave App.
- If you don’t have VIVE Wave™ Dev Kit, prepare an Android™ phone to run your sample app. Before preparing the phone, follow the steps in this section to set up the execution environment on the phone.
To run the Wave app, you need 2 kinds of APKs on your Android™ phone:
- A central Server to manage all Wave apps and Wave devices.
- A HMD and a controller DeviceService to route device tracking data and user input to Wave apps.
The following sections will show you how to install the necessary APKs on your phone.
Install Wave VR Server APK
Wave VR Server is the central server of Wave runtime. Its major functions are:
- Establish the connection between the Wave app and device service to obtain user input and tracking data.
- Send notification events to the Wave app to indicate the state change of Wave devices.
- Manage the lifecycle of the Wave app and device service.
Connect your phone to your computer and use Android adb to install wvr_server.apk on your phone.
adb install SDK/services/wvr_server.apk
Note
- Wave VR Server(wvr_server.apk) must be installed first before installing other Wave device services and apps.
Install Wave DeviceService APK
DeviceService is the device driver which routes the tracking data and user input from a Wave device to the Wave app. But, what “device” service should I install? It depends on the Wave device you are using.
- If you are using Wave Dev Kit, the corresponding HMD and controller device service should be already be pre-installed in the system. You can skip this step.
- If you are using a phone, Wave SDK provides two tools, mobile HMD and controller emulator, for practice and development. See below for more details.
Mobile HMD
Mobile HMD device service is the simple HMD driver for phones. It retrieves the sensor data from SensorManager of the Android framework and calculates the current head orientation.
adb install SDK/tools/wvr_hmd_phone.apk
Controller Emulator
Controller emulator is a simple tool that uses a second phone(Remote) as a controller that communicates with the first phone(Host) as the HMD via a Bluetooth connection. To use the controller emulator, you need to prepare the second phone first.
You will need 2 phones with Bluetooth capabilities:
On both phone, go to Settings > Bluetooth to turn on Bluetooth and pair them to each other.
- On the HMD phone, tap the controller phone’s name on the list of Bluetooth devices.
- Confirm the pairing on both phones and then leave Android settings.
Install the host side APK on the first phone, where you have installed the Wave VR server and HMD device service, and then launch it from the app list.
// HMD phone adb install SDK/tools/wvr_controller_emu_host.apk
- Install the remote side APK on the second phone. Then launch it from the app list.
// Controller phone adb install SDK/tools/wvr_controller_emu_remote.apk
On the HMD phone, there are 2 slots used to connect to the controller phone.
On the controller phone, you will see the cotroller emulator UI contains the following:
- Trackpad (large circle): Tapping and moving your finger on it triggers the touched event; Tapping it twice triggers the pressed event.
- Menu button (circle with 3 lines): Tapping it triggers the pressed event.
- System button (circle with 2 interlocked diamonds): System button is reserved, apps cannot receive the pressed event.
Select Device Service
Device service needs to be configured when the devices have changed. Wave SDK provides a tool to configure the DeviceService being used. Install and launch WaveVR Settings on your HMD phone.
adb install SDK/tools/wvr_settings.apk
Select the HMD and controller device service and then tap APPLY.
Run Wave App
Install and launch “HelloVR” on your HMD phone.
adb install samples/wvr_native_hellovr/app/build/outputs/apk/debug/app-debug.apk
You will see this scene. Use controller emulator to interact it: