Multi-Layer Canvas
Introduction
Multi-Layer Canvas is a convenience feature that leverages the existing Multi-Layer feature, which main purpose is to render a world space Unity UI Canvas as an overlay/underlay.
Multi-Layer Canvas works by automatically generating the necessary components and configurations required to render a Canvas with Multi-Layer.
Contents |
Prerequisite
In Unity Editor, go to Project Settings -> Wave XR -> Essence to import the Compositor Layer package.
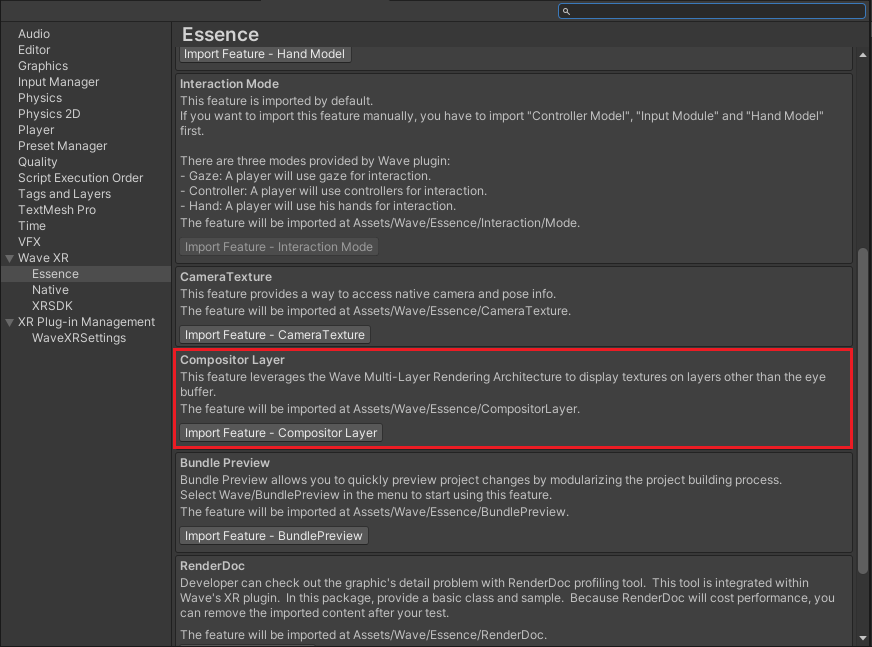
Compositor Layer Feature Pack
How to use
Note
Not all devices support Multi-Layers (e.g. VIVE Focus or VIVE Focus Plus do not support this feature).
For devices that do support Multi-Layers, the maximum number of layers allowed can be obtained by calling the Native API WVR_GetMaxCompositionLayerCount() through the Wave Native API C# wrapper. Different devices may have different max layer counts.
The API will return zero on a device that does not support Multi-Layers.
To use Multi-Layer Canvas in your project, attach a Compositor Layer UI Canvas Component onto a Game Object that has a Canvas Component in your scene and configure the related parameters listed below.
Component Parameters
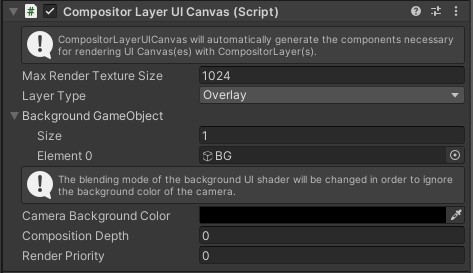
Compositor Layer UI Canvas Component (Overlay)
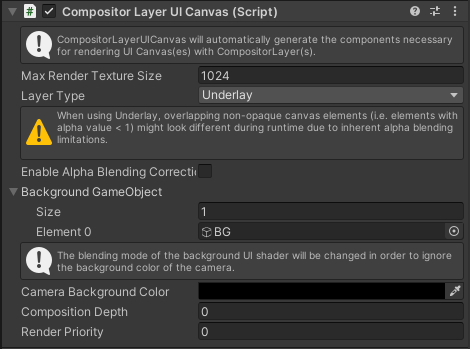
Compositor Layer UI Canvas Component (Underlay)
Max Render Texture Size: The maximum render texture dimension. For example, if max render texture size is 1024, the render texture dimensions of a canvas with an Aspect Ratio of 2:1 will be 1024 x 512.
Layer Type: Select the type of the layer.
- Overlay: Displayed on top of the eye buffer, will not be occluded by objects rendered to the eye buffer.
- Underlay: Displayed underneath the eye buffer, can be occluded by objects rendered to the eye buffer (might not be compatible with transparent objects where Alpha blending is required).
Note
Using Underlay will introduce a slight performance overhead when compared to Overlay since a custom shader is needed for a special blending operation in order to make the Underlay visible.
Also, due to inherent limitations related to the alpha blending order between the Underlay texture and the eye buffer, overlapping non-opaque UI elements (i.e. elements with alpha value < 1) might look different during runtime.
Enable Alpha Blending Correction: When Underlay is selected as Layer Type, enable this option to activate alpha blending correction. This option is useful when transparent UI elements in the Canvas are rendering darker than expected in an overall sense.
Note
Enabling Alpha Blending Correction will consume more resources.
Background GameObject: GameObject that contains an UI Component that will be used as the background of the Canvas. When successfully assigned, the area which the background UI component covers will no longer be affected by the background color of the camera.
Note
Only GameObjects that are child objects of the Canvas and consists of an UI Component can be assigned as Background GameObject.
When multiple Background GameObjects are selected, make sure that they do not overlap each other.
Camera Background Color: Background color of the camera for rendering the Canvas to the render texture target. Changing this option will affect the tint of the final image of the Canvas if no Background GameObject is assigned.
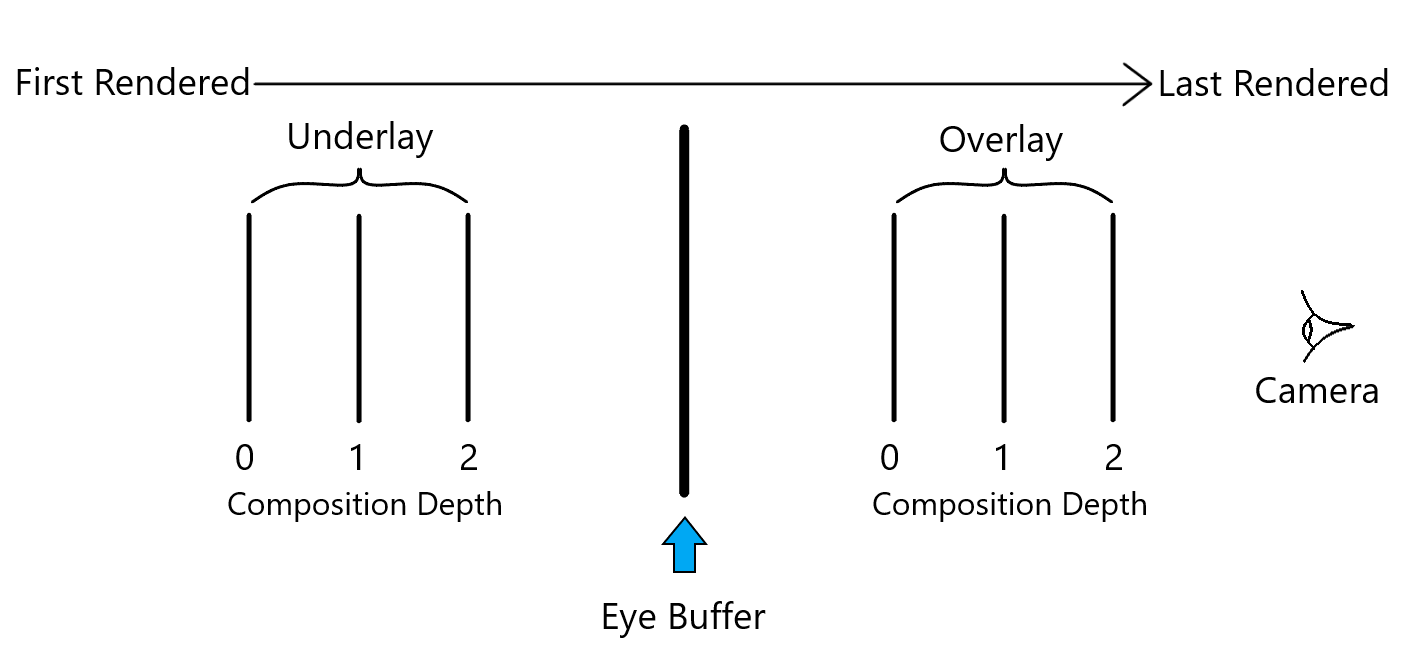
Composition Depth: Determines the rendering sequence of layers. The layer with the smallest composition depth will be rendered first. Here is an example of how the rendering sequence of the layers can be interpreted:
Render Priority: The rendering priority of the layer. When Multi-Layer auto fallback is enabled in WaveXRSettings , layers with a higher render priority and are within the maximum layer count will be rendered as Multi-Layers, while the others will be rendered in Unity.
For example, if the max number of Multi-Layers supported is 3 and there are 5 Compositor Layer components simultaneously, the three layers with higher render priority will be rendered as Multi-Layers and the remaining 2 layers will be rendered in Unity.
Note
When layers have the same render priority, the one initialized earlier by Unity MonoBehaviour will be rendered as a Multi-Layer.
Other Configurations
Replacing UI Materials
The Compositor Layer UI Canvas Component checks all of the UI Components under the current Canvas and determines whether a material replacement is needed.
It necessary to replace the default UI Material with custom ones in order to obtain better alpha blending results.
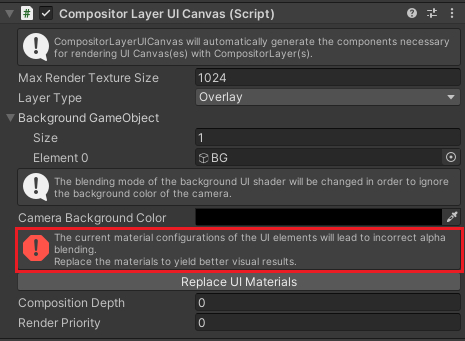
The “Replace UI Materials” button will appear when material replacement is needed.
GameObject Layer Settings
Since the Canvas will be rendered as an overlay/underlay, the layer settings of the Canvas GameObject (including child objects) have to be properly configured to avoid rendering problems like image duplication.
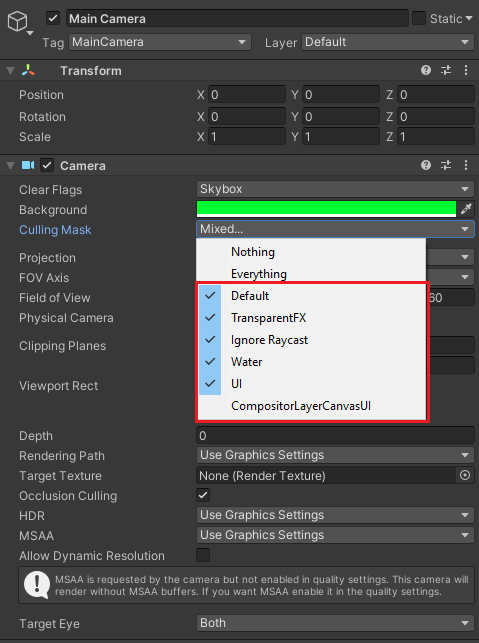
An example of a Culling Mask combination of the Main Camera.

If the GameObject layer is not culled by the Main Camera (i.e. will be rendered by the Main Camera), an error message will appear on the Compositor Layer Canvas UI Component to prompt you to change the layer settings of the Canvas GameObject (including the child objects you want to render in the overlay/underlay).
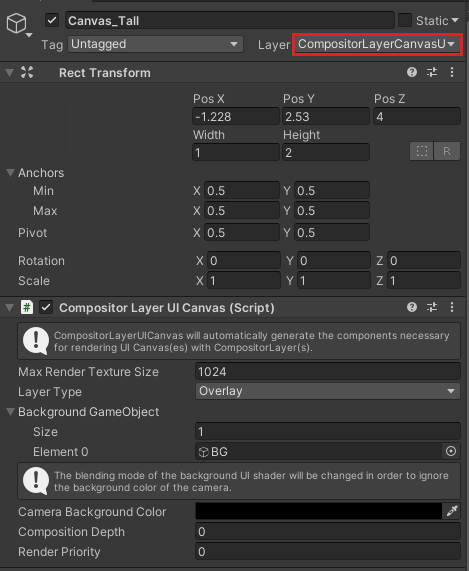
The error message will disappear after changing the GameObject layer to one that is culled by the MainCamera (i.e. will not be rendered by the Main Camera).
Resources
The imported resources of the Compositor Layer Feature Pack can be found in Assets/Wave/Essence/CompositorLayer.
You can find scripts and shaders that the Multi-Layer feature uses, as well as sample scenes for your reference.