WaveXRSettings
WaveXRSettings is where you can configure various built-in features. After importing the Wave XR Plugin, customize WaveXRSettings through the following:
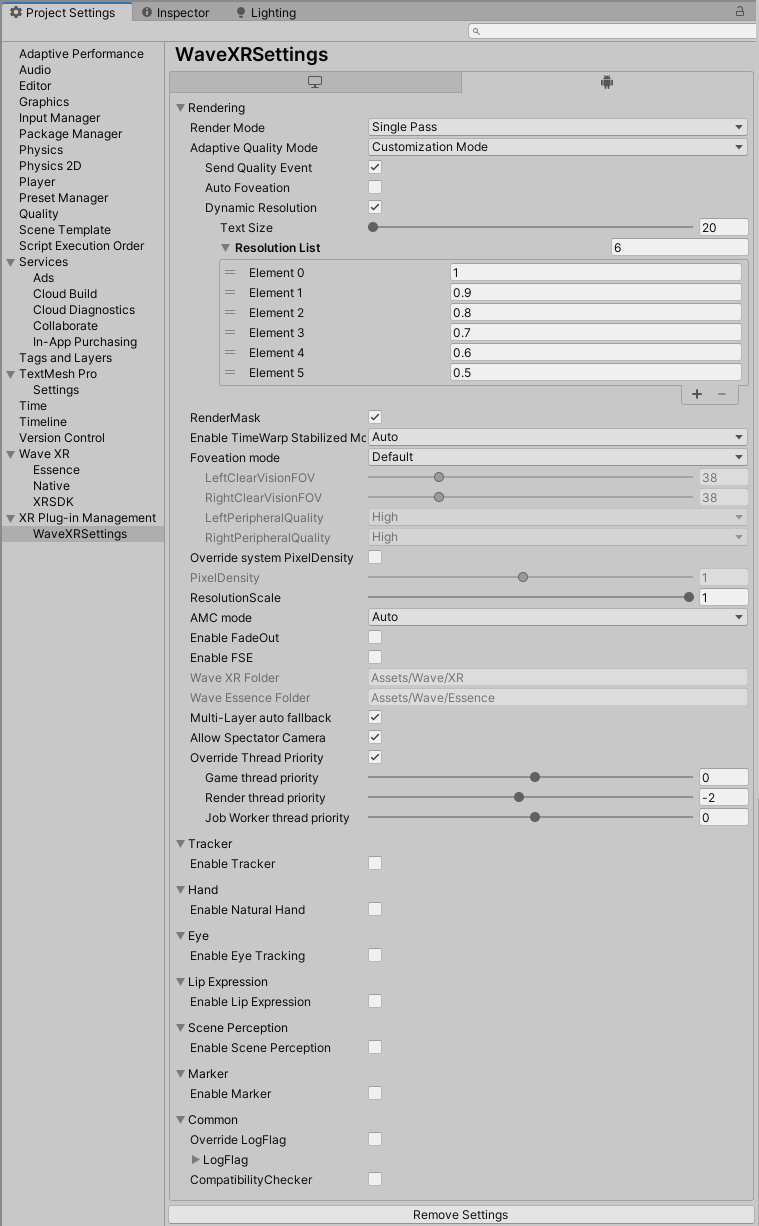
WaveXRSettings in Project Settings
Rendering
Render Mode
The default Render Mode is Single Pass. For more information, see Single Pass Stereo Rendering in the Unity documentation.
Adaptive Quality Mode
Adaptive Quality is enabled by default. It can dynamically change the rendering quality and improve the user experience of your application based on the capability of the device it is running on. This is done through the WaveVR SDK runtime that is responsible for adjusting CPU/GPU performance and other Wave SDK features automatically according to the currently selected Adaptive Quality Mode:
- Quality-Oriented Mode: Recommended for light-weight applications and applications that prioritize visual quality over performance.
- Dynamic Resolution will start with the highest rendering resolution provided by the Wave Runtime.- Dynamic Resolution will not set the rendering resolution to a value that is lower than the default rendering resolution.- Automatically adjust the peripheral quality of foveated rendering between High and Off.
- Performance-Oriented Mode: Recommended for applications with heavier workloads and applications that prioritize performance over visual quality.
- Dynamic Resolution will start with the default rendering resolution.- Dynamic Resolution will not set the rendering resolution to a value that exceeds the default rendering resolution.- Dynamic Resolution will allow the rendering resolution to decrease to the resolution scale lower bound.- Automatically adjust the peripheral quality of foveated rendering between High, Middle, Low and Off.
- Customization Mode: Choose the Adaptive Quality features that suit your application.
Comparison between Quality-Oriented Mode and Performance-Oriented Mode:
| Quality-Oriented Mode | Performance-Oriented Mode | |
|---|---|---|
| Auto performance level | Enabled | Enabled |
| Auto foveation intensity | Only with peripheral quality High and Off | peripheral quality with High, Middle, Low and Off |
| Auto dynamic resolution | 1 < Available scale size < Upper bound | Lower bound < Available scale size < 1 |
Note
Auto foveation may incurs a slightly GPU performance drop in scene with simple shader. For more information on foveated rendering, see Foveated rendering.
For more information on the behavior of Dynamic Resolution under different Adaptive Quality Modes, see Dynamic Resolution.
For more information on Adaptive Quality, see Adaptive Quality.
Dynamic Resolution
To use this feature, Send Quality Event in Adaptive Quality must be enabled. If you want a specific scene to be configured differently from the global settings, manually add a Dynamic Resolution component in a Game Object in the scene.
For more information, see DynamicResolution and XRSettings.eyeTextureResolutionScale.
Text Size
Text Size is measured in DMM, which is for determining the lower bound of the values in the Resolution List. For more information, see DynamicResolution component.
Resolution List
The Size of the list is the number of Resolutions Scale levels which Dynamic Resolution can cycle through. Each level is a Resolution Scale value. During runtime, the level will be adjusted according to events send by Adaptive Quality.
Default Index
The initial level in the Resolution List.
RenderMask
RenderMask (Occlusion Mesh) will cover areas hidden to the user on the screen and reduce graphic output to save power. It is enabled by default.
The XRSettings.useOcclusionMesh will not work if XR Plug-in Management is used. You can only enable and disable the occlusion mesh here.
Enable TimeWarp Stabilization
You can set TimeWarp Stabilization to Off, On or Auto.
TimeWarp Stabilization can reduce jitter when the rendering process of the previous frame cannot be finished in time by the GPU but the following frame can be finished in time.
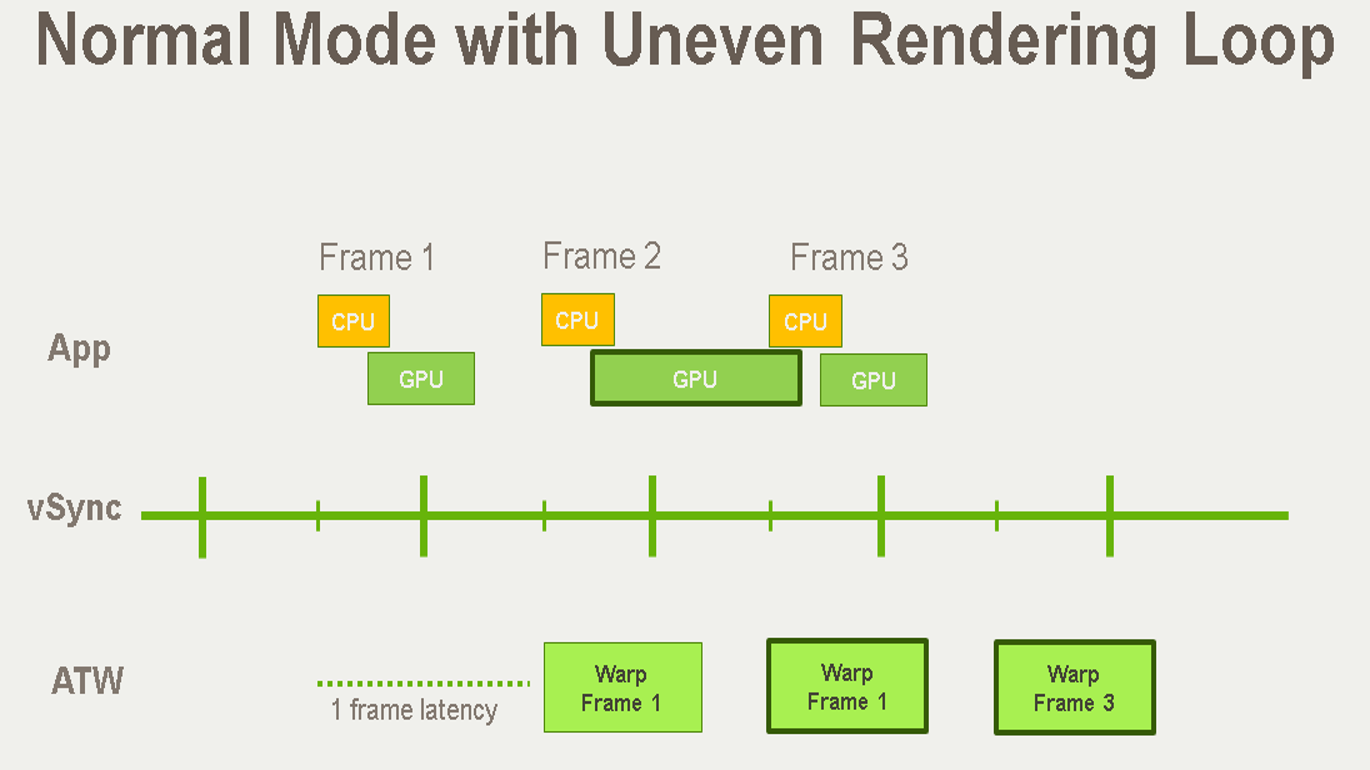
Without TimeWarp Stabilization
Without TimeWarp Stabilization, if the GPU cannot finish rendering a frame in time (Frame 2), the previous frame (Frame 1) will instead be used by TimeWarp to reduce latency. This means that the frame rendered (Frame 2) will be discarded assuming that the GPU finishes rendering the next frame (Frame 3) in time.
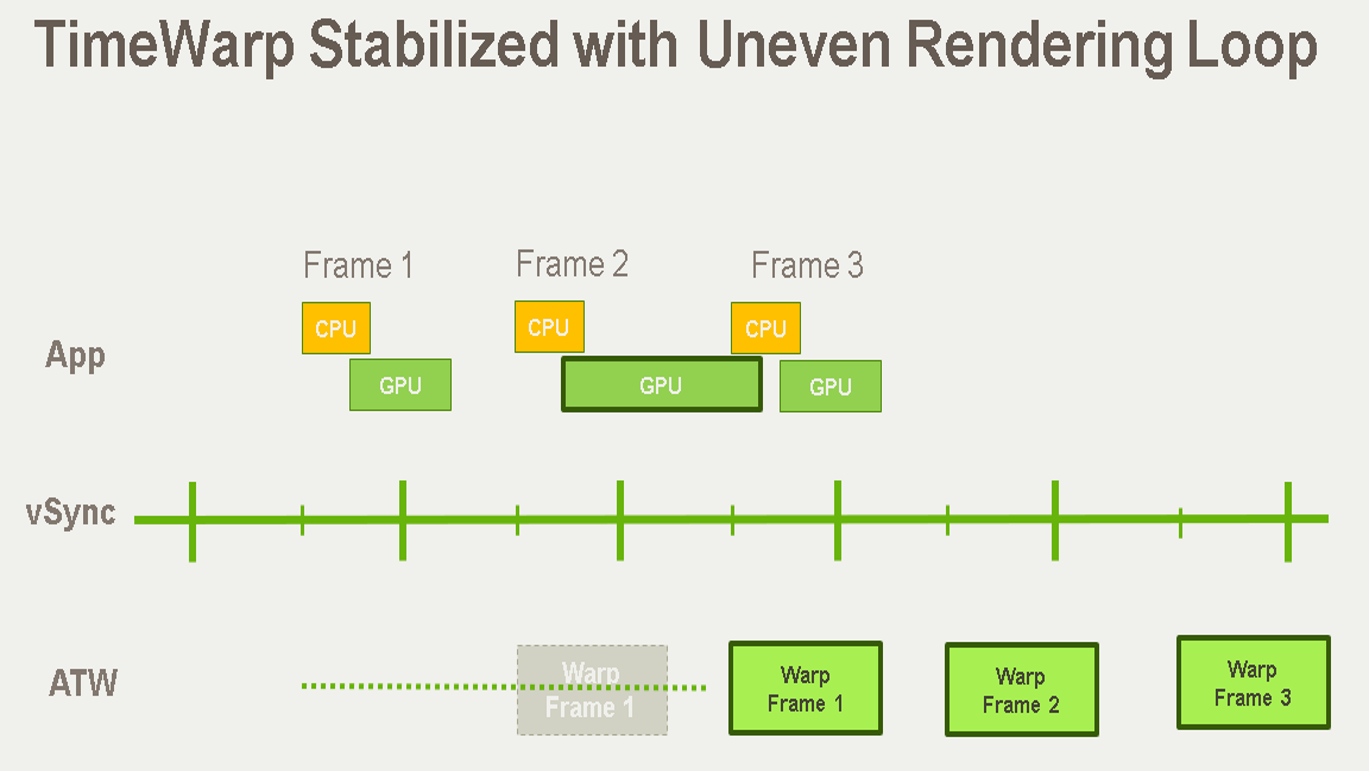
With TimeWarp Stabilization
Instead of discarding the delayed frame, TimeWarp stabilization will keep the frame in order to maintain a smoother visual experience. This will introduce latency but pose prediction will also be leveraged to reduce the perceived latency.
Foveation mode
Choose between Default, Enable, Dynamic and Disable.
If Default is selected, Foveated Rendering will be enabled using the Wave preset. Or Dynamic will gain more performance while HMD is moving. Choose Enable to customize the settings.
For more information about mode selection and setting, see Foveated Mode, Foveated Rendering.
Warning
The foveation setting will not work when Auto Foveation in Adaptive Quality. It will been controlled by Adaptive Quality instead.
Override System Pixel Density
Select to override default Pixel Density settings.
Pixel Density
The default Pixel Density is 1, which means the eye texture maps to a screen of the same size when Resolution Scale is 1. If you have concerns regarding performance, use a smaller Pixel Density.
The eye texture size will be multiplied by Pixel Density and Resolution Scale in both the width and height.
Resolution Scale
The default Resolution Scale is 1. This means eye texture size follows the setting of the Pixel Density.
The eye texture size will be multiplied by Pixel Density and Resolution Scale in both width and hight.
Resolution Scale can be also be updated during runtime. See XRSettings.eyeTextureResolutionScale.
Warning
The Resolution Scale setting will be overridden if Dynamic Resolution is enabled.
AMC Mode (Experimental)
AMC stands for Adaptive Motion Compensator.
When AMC is activated, the FPS of the application may drop but the motion of objects on screen will look smoother thanks to the compensation.
Note
The compensated result may have visual artifacts. Since AMC is an experimental feature, enabling it might lead to abnormal behaviors in certain applications.
There are four options for AMC:
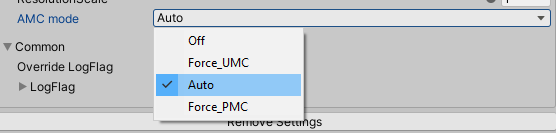
AMC modes: Off, Force UMC, Auto, and Force PMC.
Off
AMC is disabled. This is the default value.
Force_UMC
UMC (Universal Motion Compensator) method is always activated.
Auto (Recommended)
AMC can be activated automatically when the FPS is lower than a certain level. The UMC or PMC method will be chosen automatically. You need to install VIVE Wave XR Plugin - Essence to enable this option.
Force_PMC
PMC (Positional Motion Compensator) method is always activated. You need to install VIVE Wave XR Plugin - Essence to enable this option.
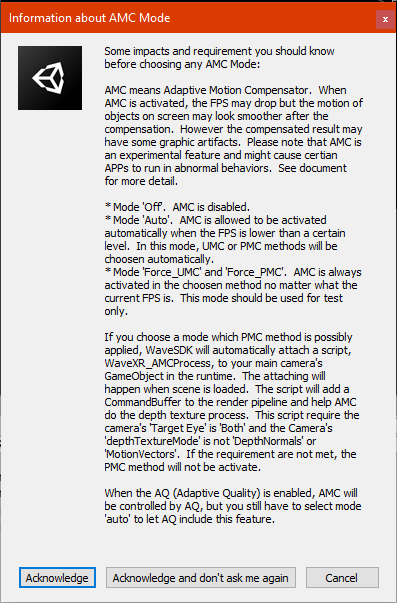
About PMC
If you choose a mode where PMC might be applied, Wave SDK will automatically attach a script (WaveXR_AMCProcess) to your main camera’s GameObject during runtime when the scene is loaded. The script will add a CommandBuffer to the render pipeline which will help AMC carry out depth texture post-processing. The script requires that:
- Camera Target Eye is set to Both
- Camera depthTextureMode is neither DepthNormal nor MotionVectors.
If the requirements are not met, PMC will not be activated.
WaveXR_AMCProcess may not be suited for all scenes. If you are planning to use PMC, check the script carefully.
The PMC method will also need extra depth textures, and it will cost memory.
Adaptive Quality and Adaptive Motion Compensator
When the Adaptive Quality is enabled, it will control the Adaptive Motion Compensator. However, Auto in AMC mode needs to be selected for Adaptive Quality to control the Adaptive Motion Compensator.
For more information about AMC, click here.
Enable FadeOut
Select this option if Fade Out Effect is used in the project. Disabled by default.
Enable FSE (Frame Sharpness Enhancement)
Select to enable the Frame Sharpness Enhancement feature. Disabled by default.
For more information on FSE, see Frame Sharpness Enhancement .
FSE (Frame Sharpness Enhancement) Level
When Enable FSE is selected, you can adjust the enhancement level through the FSE Level slider. Level is set to 0.5 by default.
For more information on FSE, see Frame Sharpness Enhancement .
Multi-Layer auto fallback
Select to enable the auto fallback feature when using Multi-Layers . Selected by default.
Allow Spectator Camera
This feature can provide centered point of view when user want to record, take screenshot, or broadcast. The traditional result of record and screenshot are using one eye’s texture. The field of view is not balanced. If allow spectator camera, an external mono-eye camera will be created when necessary to render the scene with center eye pose. It will cost some performance because it render the scene again. However, the result is better than the traditional. WaveVR hope you to enable this feature. Thus, we set it default checked.
For more details about the Spectator Camera Feature, please refer the this tutorials
Note
You should set “MainCamera” to the Tag for all your VR cameras’ GameObject. If not, the screen record will be black.
Traditional. Record from the left eye.
Using spectator camera. Centered view and wide FOV.
By using Spectator Manager , you can capture video and screenshot from third-person view.
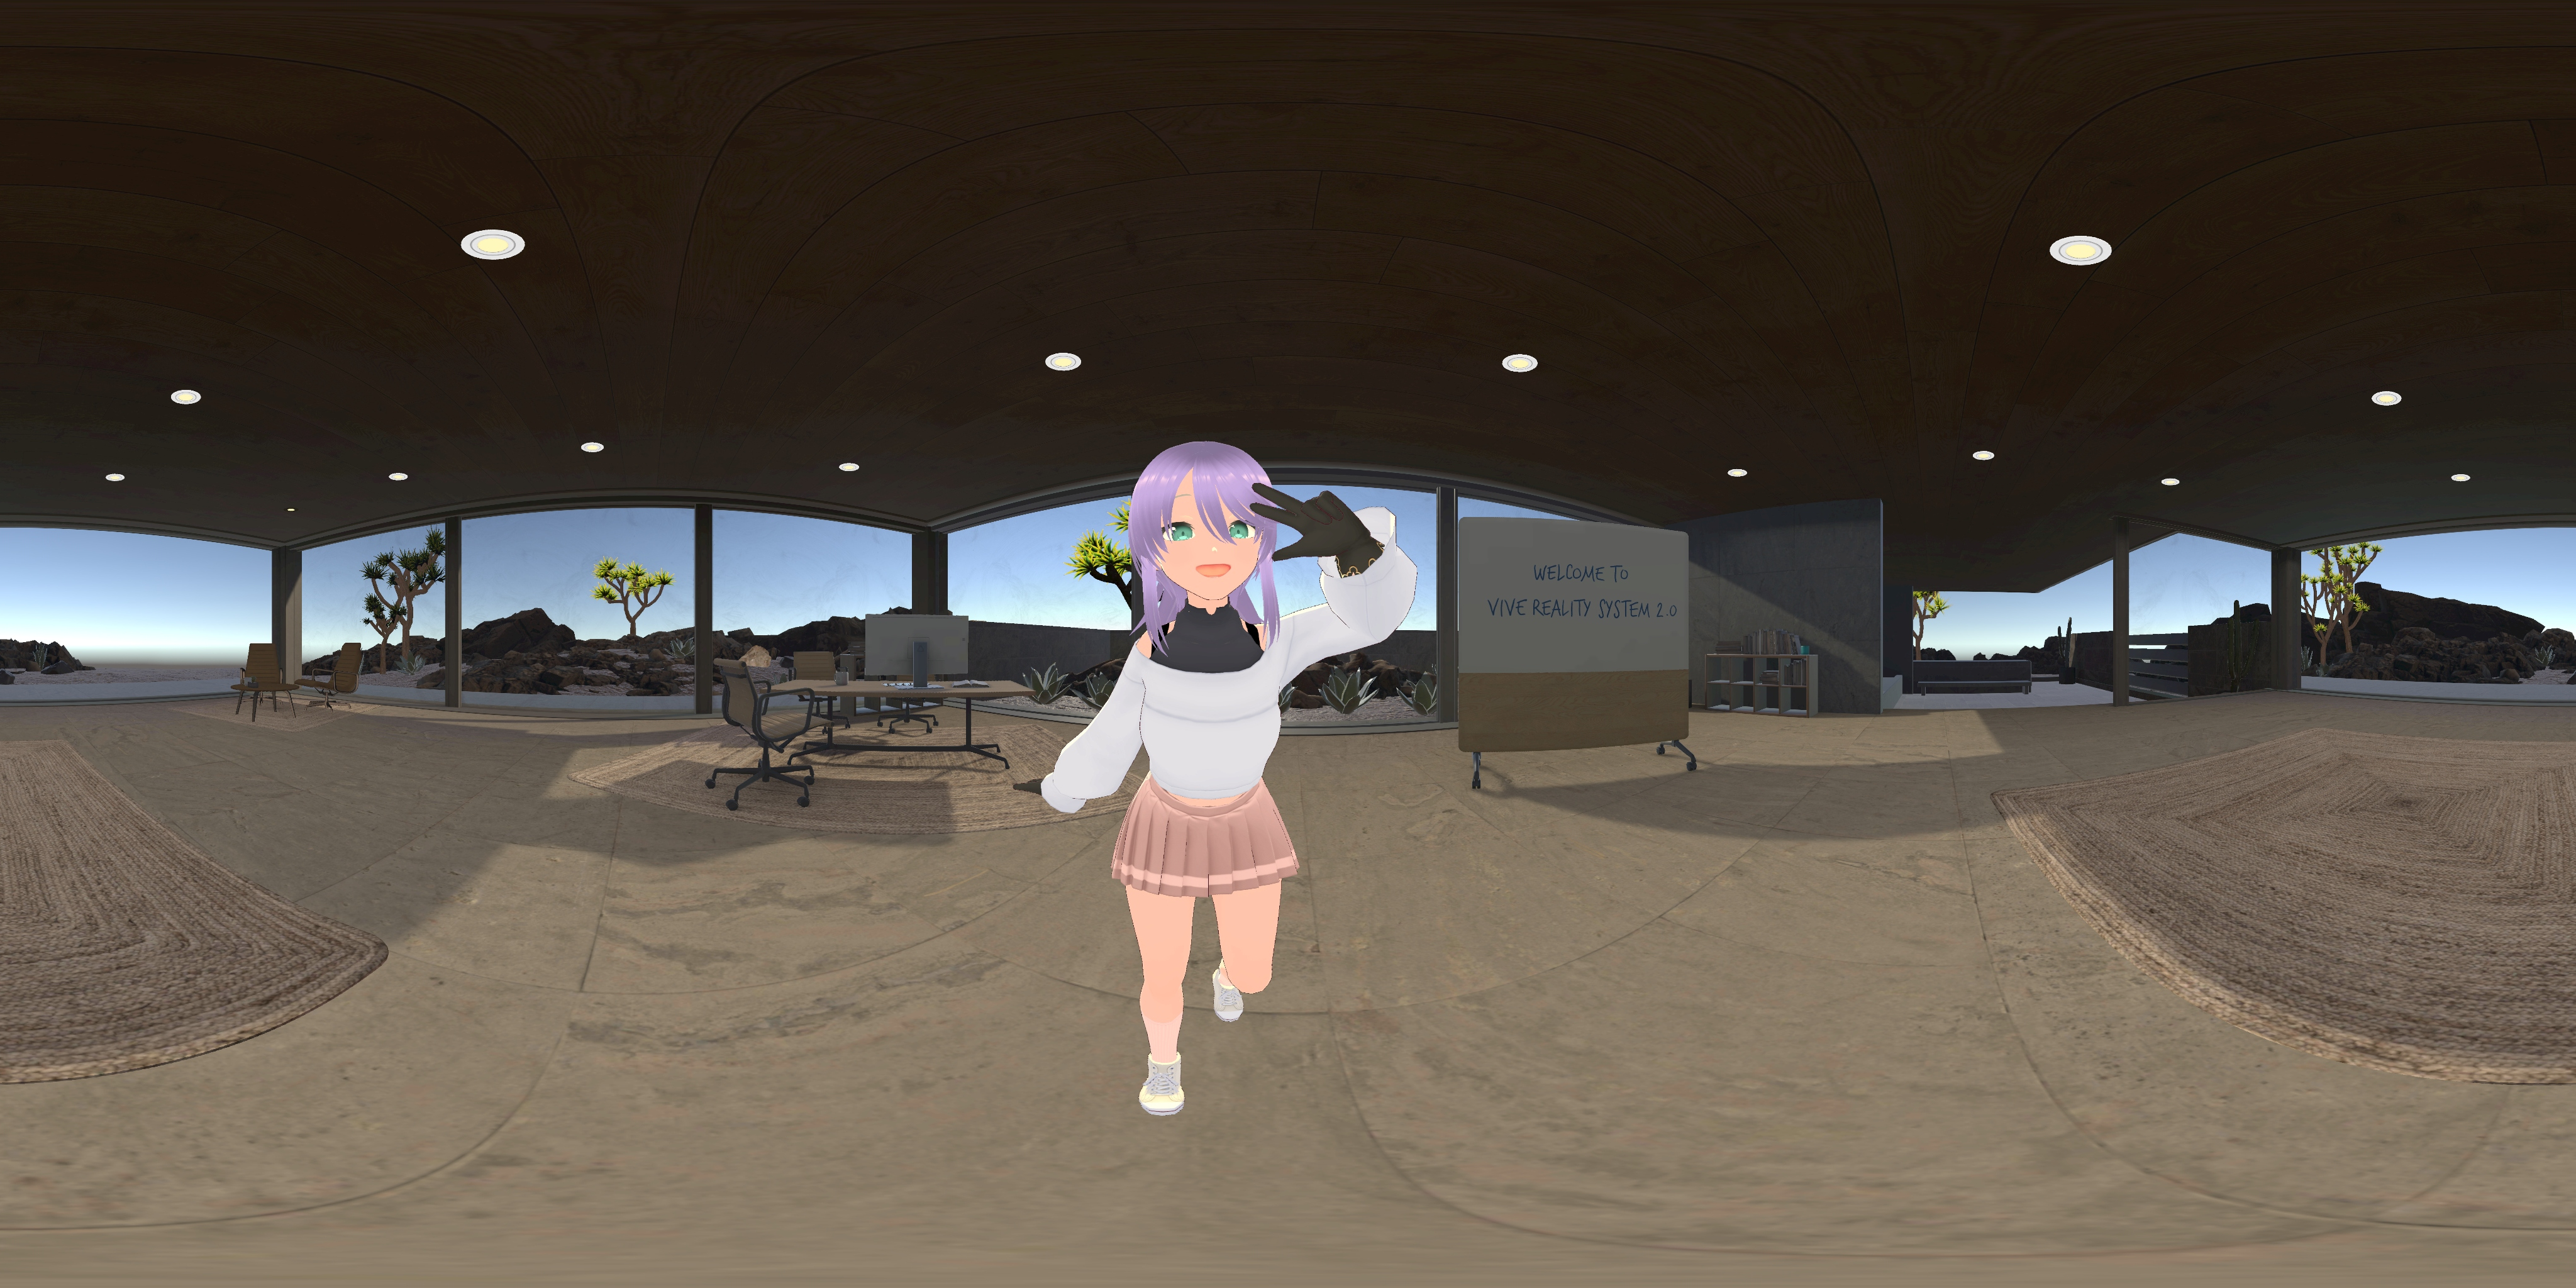
A 360 screenshot is also available for third-persion view. Check the following 360 screenshot:
Override Thread Priority
For thread priority please see Unity’s document Android thread configuration first.
Warning
Experimental feature
This settings need a greater level of experience in Android system development. Modifying these settings may not always take effect or could protentially lead to undesired outcomes. Use it at your own risk.
If you need let Unity’s thread priority higher or lower, you can use this settings to do so. This is just a helper feature, and it helps you not to make your own UnityActivity. However, you can still accompolish changing thread priorities by making your own UnityActivity.
If you checked the Override Thread Property checkbox, we will add some meta-data in AndroidManifest.xml. The meta-data will turn into the command line when Activity is loaded. See the command line information in Android thread configuration .
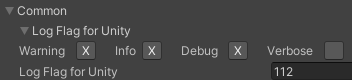
Common
Log Flag for Unity
VIVE Wave™ Unity plugin uses the flags control which kind of C# log (Warning, Info, Debug or Verbose) will be printed in the application runtime.
For example, you can deselect the Debug block then the debug level log will disappear in the application runtime.
Log Flag for Unity: Show the bitmask value of Unity log flags.
Override Log Flag
Override the Log Flag for native. The default Log Flag is 0x11101(69889). This means that the log levels of Basic, Lifecycle, Render, and Input are set to 1. Select Override Log Flag to customize the Log Flag.
You can override the Log Flag and set everything to 0 so that the Wave XR Plugin native code will generate fewer logs. If you set Log Flag to 0xFFFFF, there will be a large number of logs. If you need to report issues, enable more Log Flag to collect related log and email the log to us.
Log Flag
Select a check box to toggle a Log Flag (an X will appear when enabled). For each row of Log Flag check boxes, the leftmost box represents the lowest bit and the rightmost box represents the highest bit. Setting a higher bit will create a log that is more detailed.
Log Flag For Native
The final result of chosen bits in the Log Flag field. You can also modify the Log Flag here.