Render Mask
Introduction
Some areas in the Render Texture can’t be seen in the headset when the headset is stationary. To save power and for better rendering performance, Render Mask can be used to mark areas that don’t need to be rendered. The green color indicates the mask area. (The mask area is normally black, it was made green in the image below to make it easier to see.)
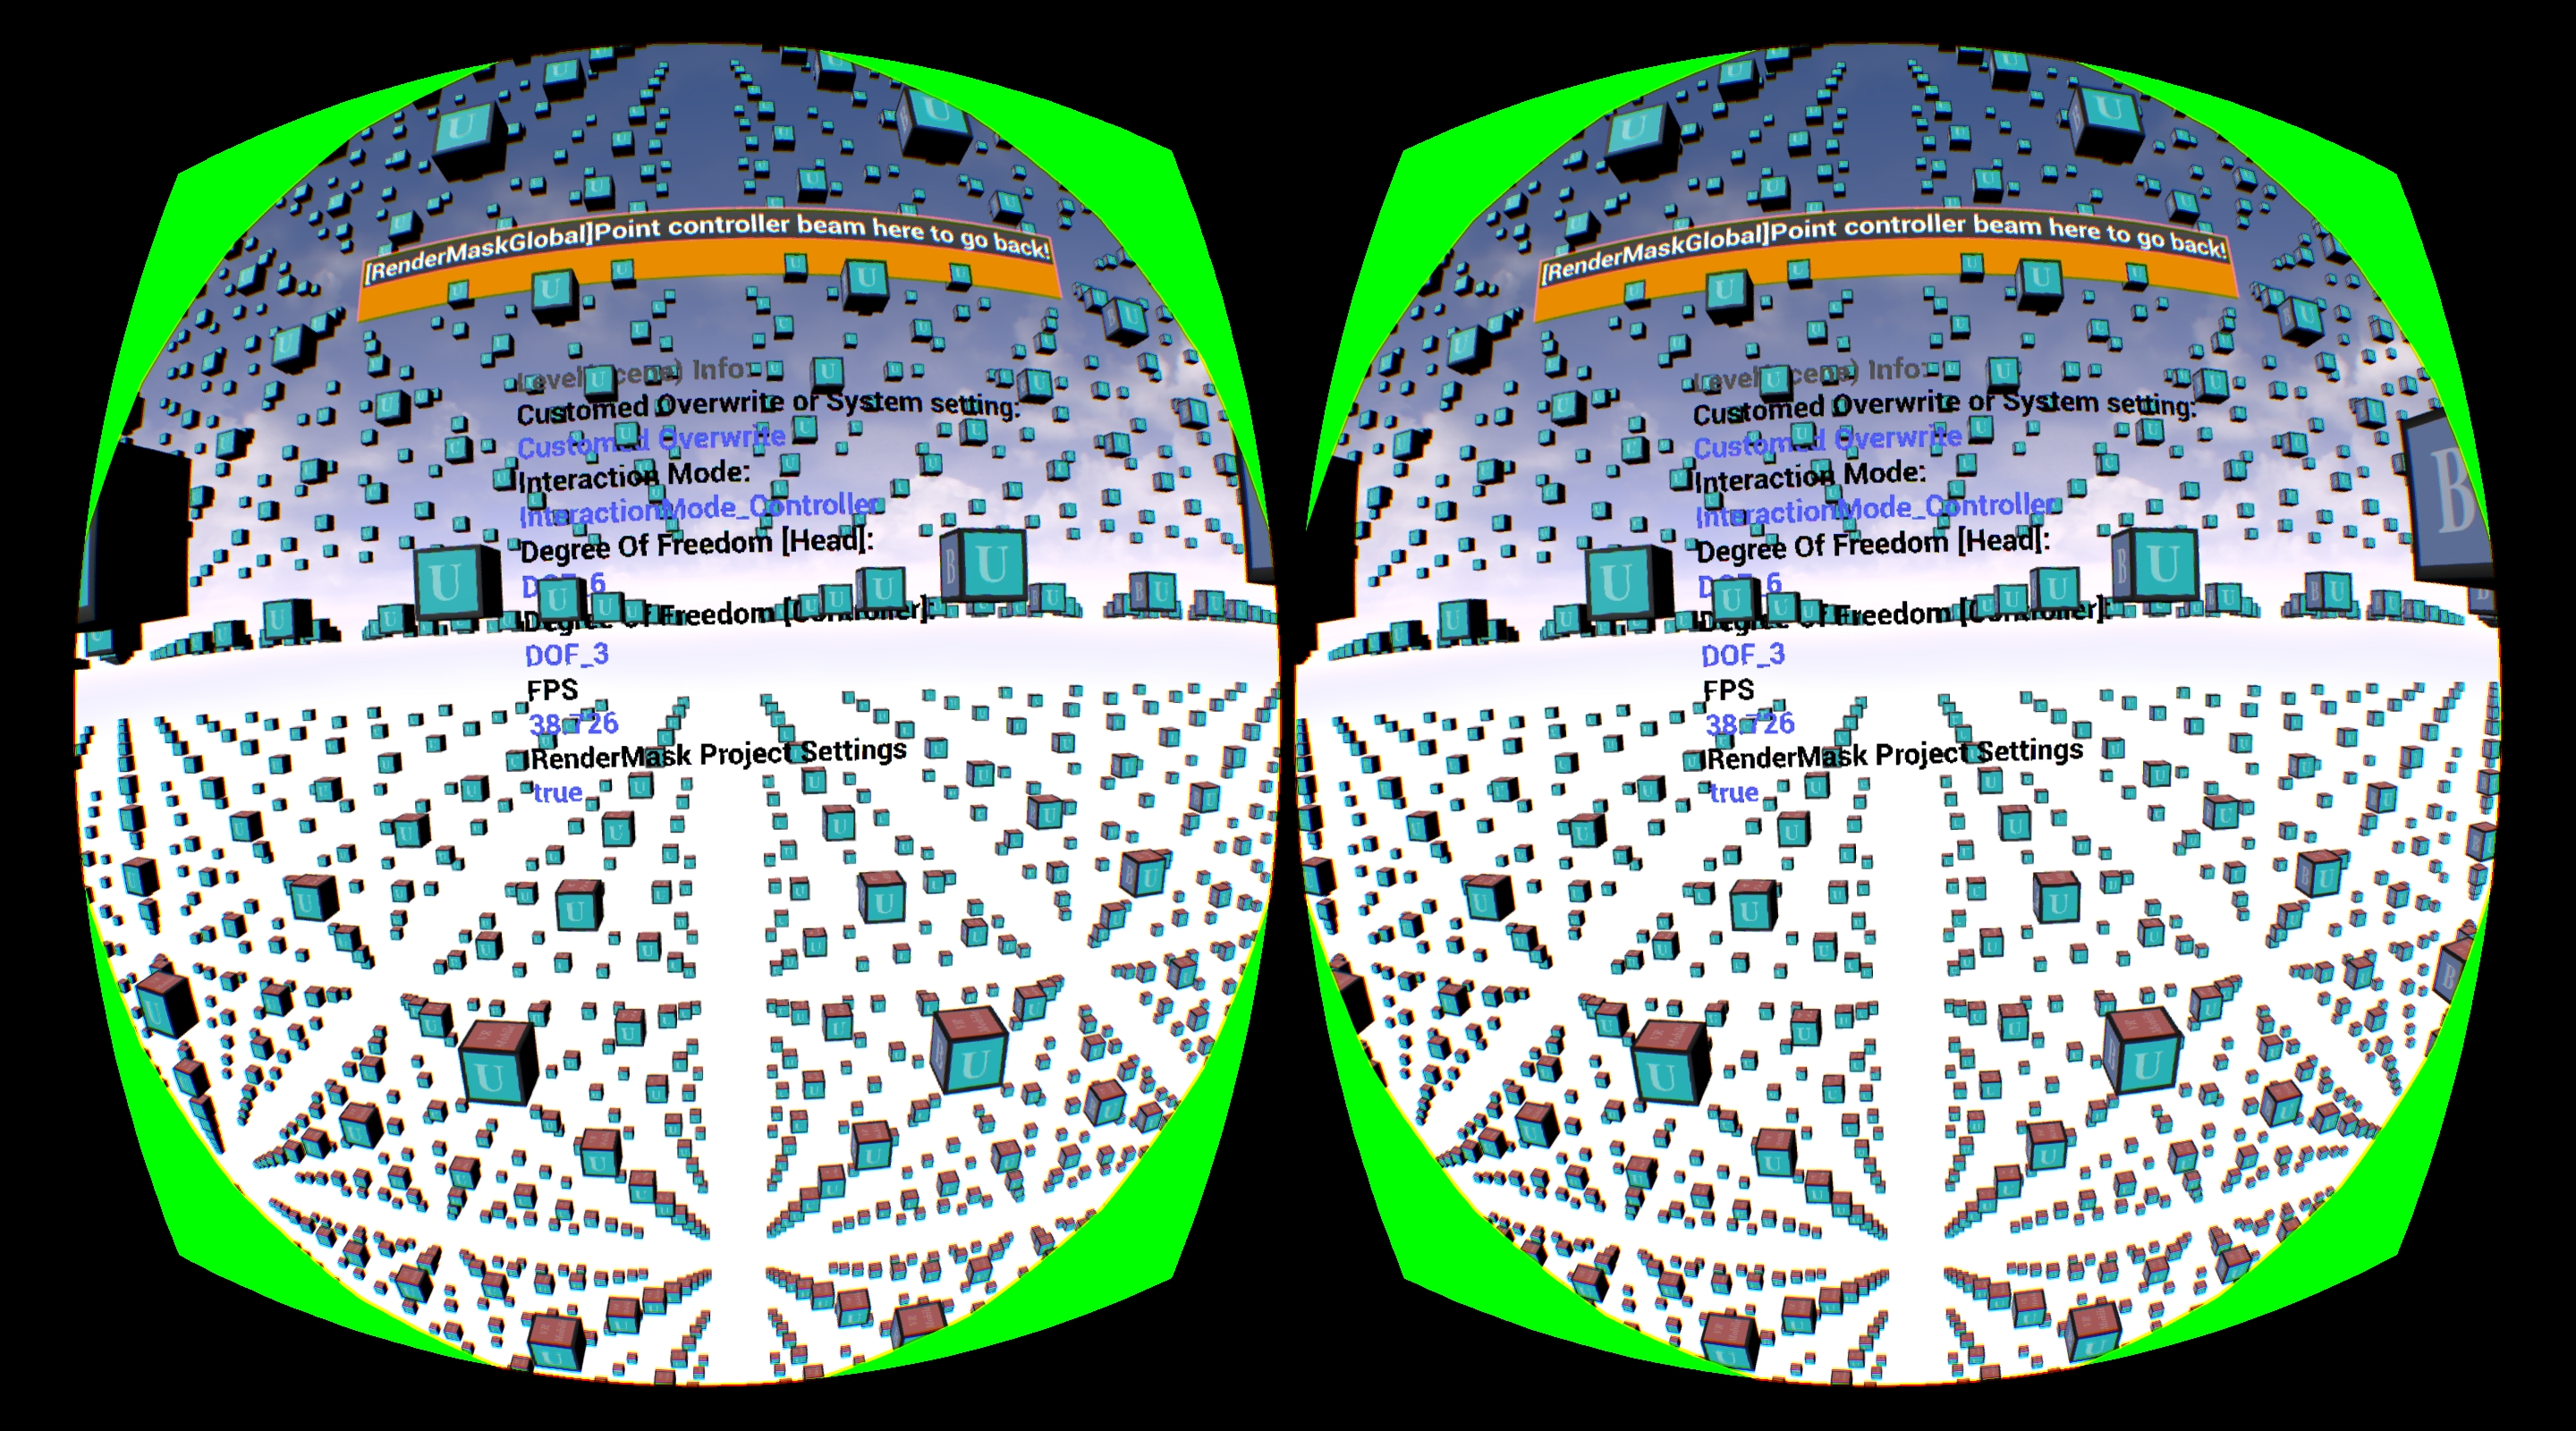
Render Mask will render a mask on the areas (green color in the image) before the camera renders everything. The mask will write to depth based on the nearest distance. After that, other contents whose material does the depth test and contents in the masked areas will not be rendered by the GPU.
Render Mask is device dependent meaning that mask areas are decided by the device. If a device provides a Render Mask mesh in the runtime, it means the device supports the early Z test, and Render Mask is supported.
Render Mask can be set in Project Settings > Plugins > Wave VR > Render > Enable Render Mask . By default, Enable Render Mask is set to DEFAULT which means to follow the global settings. However you need use blueprint to get this global settings.
Note
If the LateUpdate feature is enabled, the Render Mask will be not activated even if it is enabled by default. LateUpdate is always enabled by default.
Blueprint Design
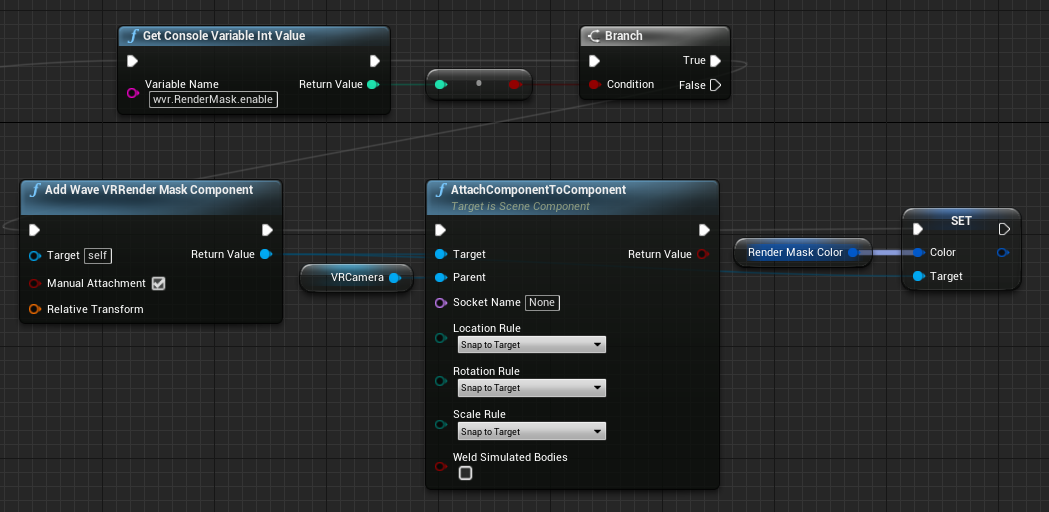
Since we removed the old WaveVR_Pawn, if you want to use RenderMask, you can add the RenderMask by following blueprint design:
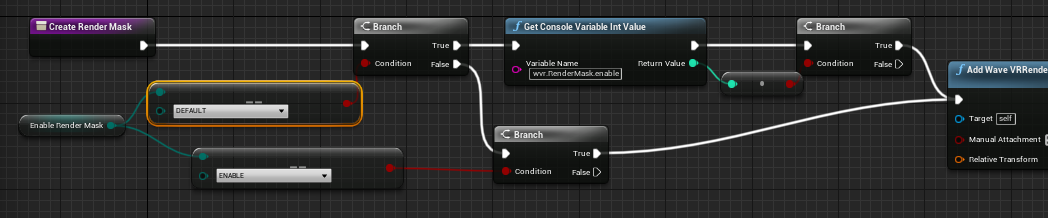
You can use this design to get the global config in ProjectSettings to help you config in your pawn:
These are debug settings.
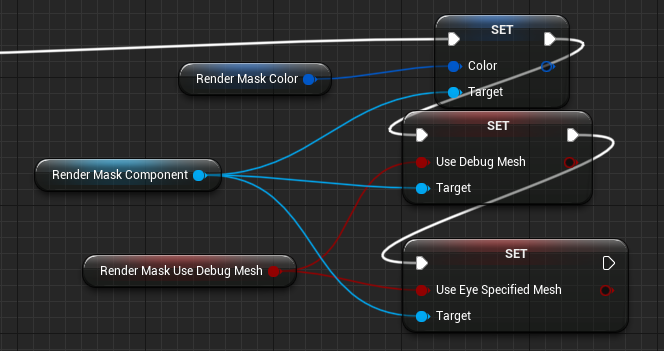
Config the WaveVRRenderMaskComponent