Set up Camera
Whether your Wave VR project is a seated or standing experience, the manner in which the Camera is set up will be the same. This how-to provides steps on setting up the Camera for use with Wave VR experiences.
Steps:
These steps will guide you on project setup requirements, as well as in creating the needed Pawn Blueprints for Wave VR.
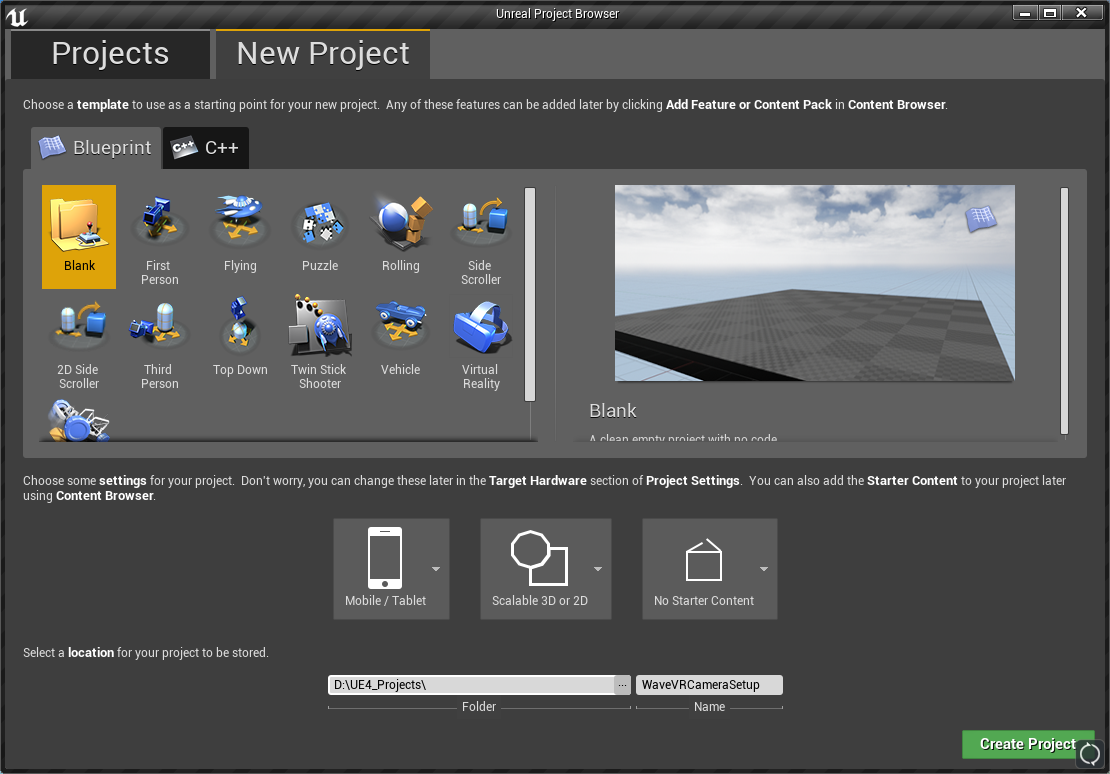
Create a new UE4 project with the following settings, and then press the Create Project button:
- Blueprint
- Blank Project
- Mobile / Tablet
- Scalable 3D or 2D
- No Starter Content
- Location for the project to be saved
- Name for the project
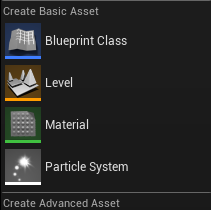
- Once the project loads, right-click in the Content Browser. From the displayed menu, go to the Create Basic Asset section and select the Blueprint Class option.
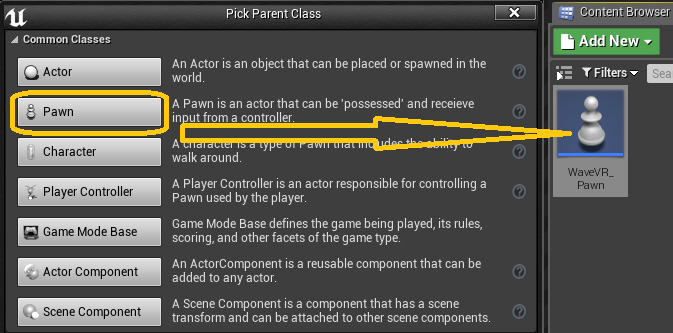
- From the Pick Parent Class window, select the Pawn option, and then name it as WaveVR_Pawn.
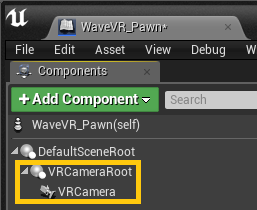
- Open the WaveVR_Pawn Blueprint, and go to the Component section of the Viewport tab. From the tab, add these two components with the following names, making sure that the VRCamera is a child of VRCameraRoot:
| Component Name | Value |
|---|---|
| Scene | VRCameraRoot |
| Camera | VRCamera |
Note
Whatever VR HMD you are using, this is the Epic recommended way to set up a VR camera, since it allows you to offset the position of the camera without having to move the actual camera.
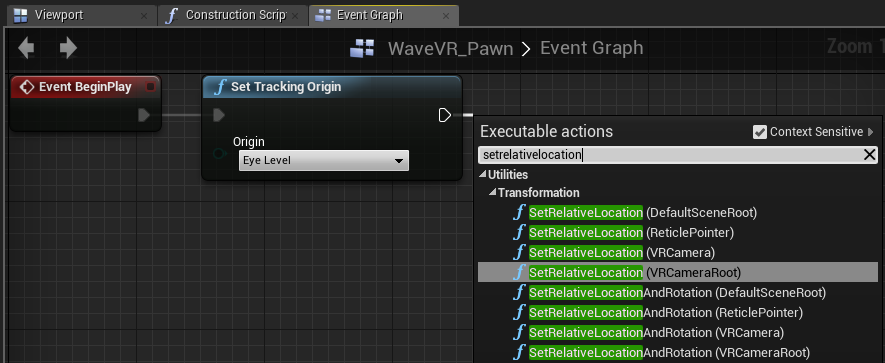
- Open the WaveVR_Pawn Blueprint. On the Event Graph, drag the Event Begin Play node to show the Executable Actions list. Search for the Set Tracking Origin node, and then click it to add it to the Event Graph. Make sure the Origin of the Set Tracking Origin node is set to Eye Level.
- In the Variables section, create a new Vector variable called CameraHeight and set the Z value to 180.

Note
This number, set in CameraHeight, should be set to the real-world standing height of the user in Centimeters.
- Drag the output of the Set Tracking Origin node and search for the Set Relative Location node, selecting the SetRelativeLocation(VRCameraRoot) option.
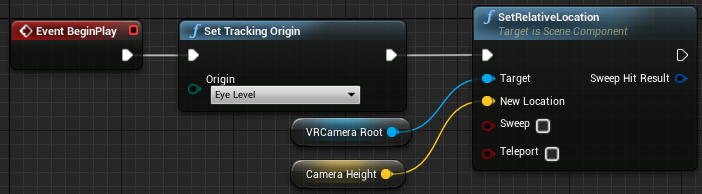
- Connect the Camera Height variable to the New Location input on the Set Relative Location node, and then click the Compile button. When completed, your Event Graph should look like the following:
- Drag the WaveVR_Pawn Blueprint from the Content Browser to a level, making sure that it is placed as close to the ground as possible.
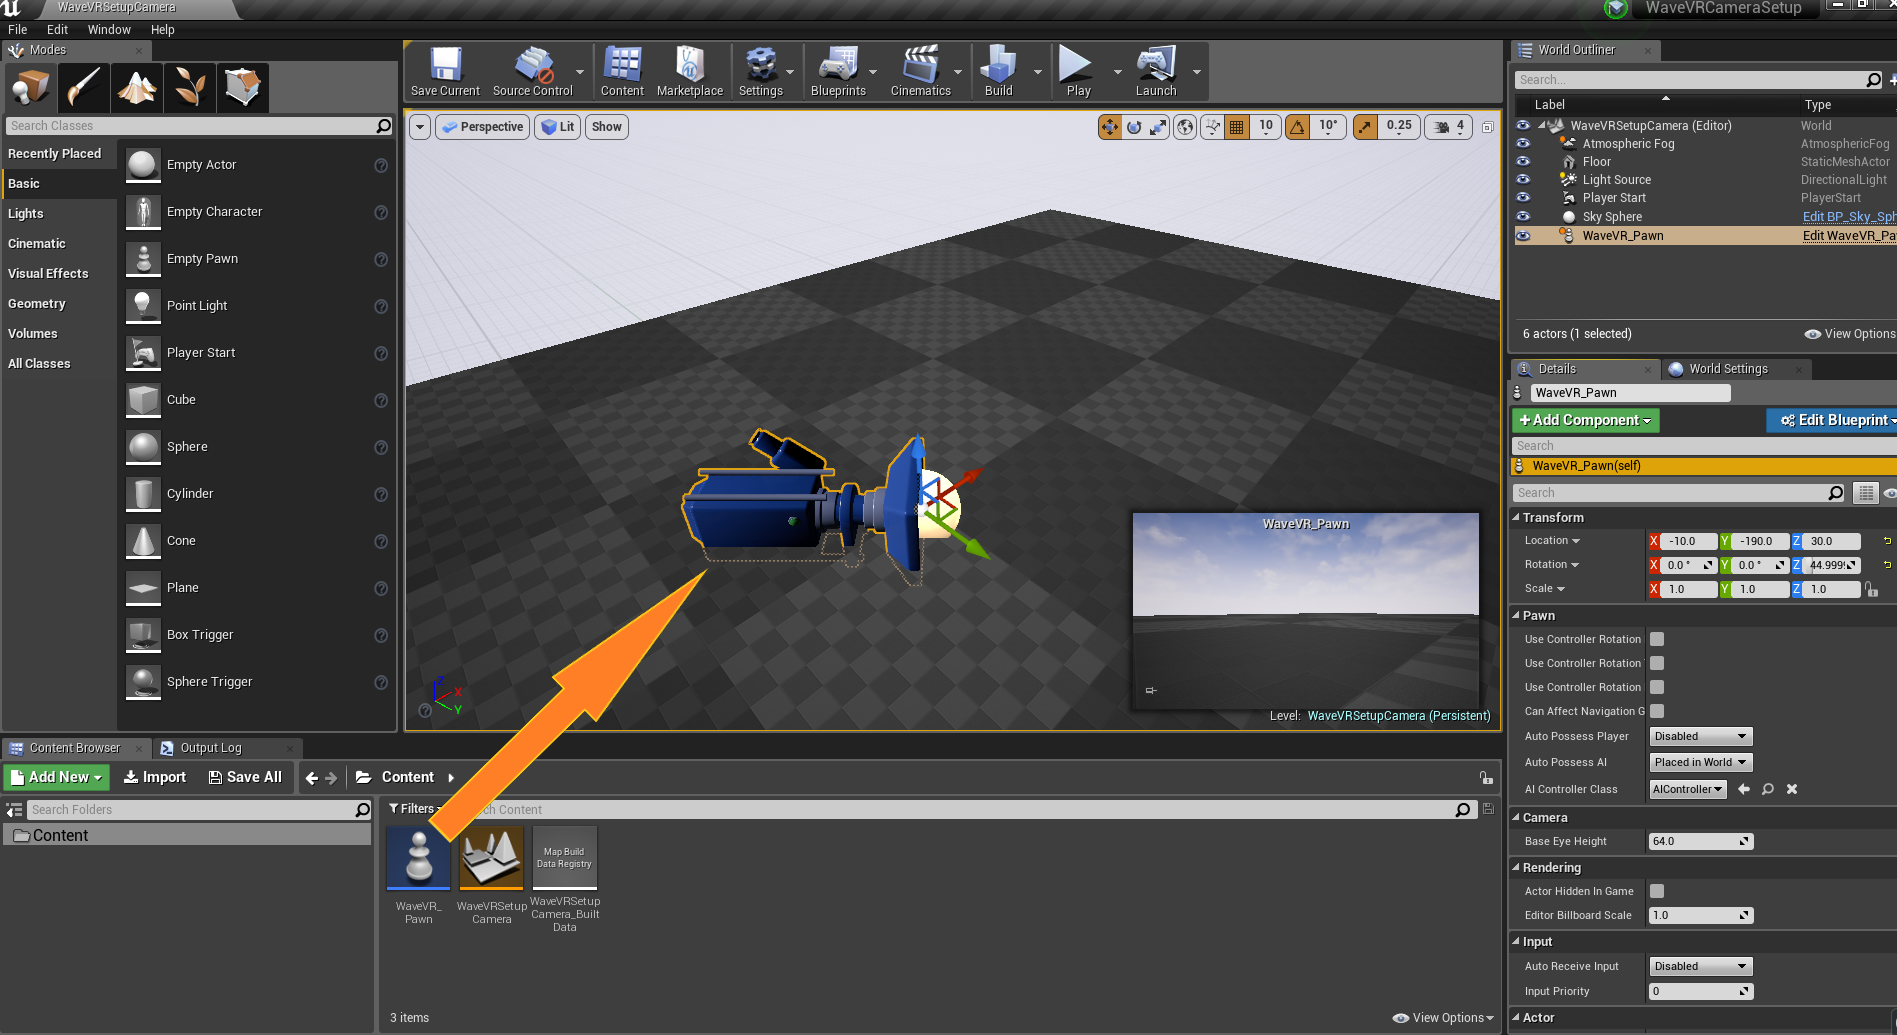
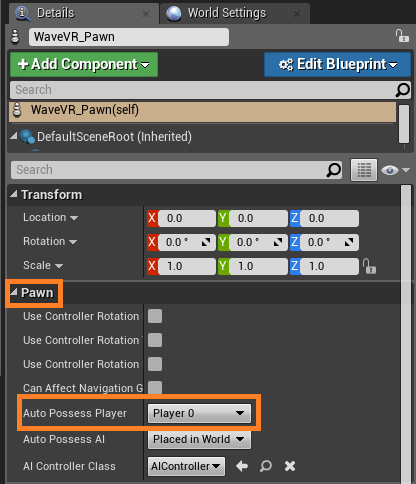
- Select the WaveVR_Pawn Blueprint, and in the Details panel under the Pawn setting, set the Auto Possess Player from Disabled to Player 0.
End Result:
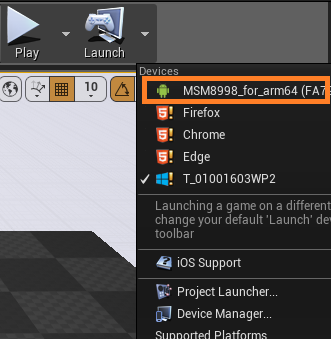
To complete the process, go to the main toolbar and click the small white triangle next to Launch Options. Select your Android device from the list to start packaging and deployment to that device.